Pumpkin Craft Ideas for Preschool: 28 Easy Projects for Fall

The second October hits, preschool classrooms and kitchen tables fill up with orange paint, googly eyes, and that one kid who’s eaten more pom-poms than he’s glued down. Crafts with pumpkins for preschool are basically a fall rite of passage. A pumpkin is round, friendly, and forgiving enough that a 3-year-old’s version comes out looking pretty great almost no matter what. Teachers need a week of circle time filled. Parents need something to do on a rainy Saturday. Pumpkin crafts for preschoolers solve both at once, which is maybe why they never go out of style.
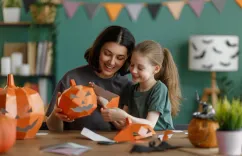
These preschool pumpkin crafts work just as well in a classroom pumpkin unit as they do at home, and most scale up or down for a toddler, a preschooler, or a kid who’s about to head into kindergarten.
Why Pumpkin Craft Activities Matter for Preschoolers
Pumpkin craft activities matter for preschoolers because they build fine motor, early science, math, and confidence skills while looking like simple fall fun. There’s real development happening underneath all that glitter glue.
- They build fine motor skills. Squeezing a glue bottle, pinching pom-poms, and gripping a paintbrush all strengthen the small hand muscles preschoolers will later use to hold a pencil. According to the National Association for the Education of Young Children, open-ended, process-focused art like this is one of the most developmentally appropriate ways to build those skills in the preschool years.
- Early science sneaks in too. Cutting open a pumpkin to scoop seeds, or gluing together a pumpkin life-cycle sequence, gives kids a hands-on look at how a plant actually grows.
- So does early math and language. Counting seeds, sorting pom-poms by color, naming shapes: a craft that looks like play is doing a lot of quiet teaching.
- A pumpkin craft is nearly impossible to “get wrong.” That makes it a low-pressure way for preschoolers to feel genuinely proud of something they made themselves.
- It’s also just calming. Gluing and painting slow kids down, which is why pumpkin crafts work well dropped into a quieter stretch of the day between more active games.
Help your child
grow with Keiki
We’ll help you turn everyday screen time
into real learning progress.
Easy Paper Pumpkin Crafts for Preschoolers
If you’re filling out a whole pumpkin theme for the week, start here. Paper pumpkin crafts are cheap, barely make a mess, and you can prep a stack of them for an entire classroom in about ten minutes.
Paper Plate Pumpkin
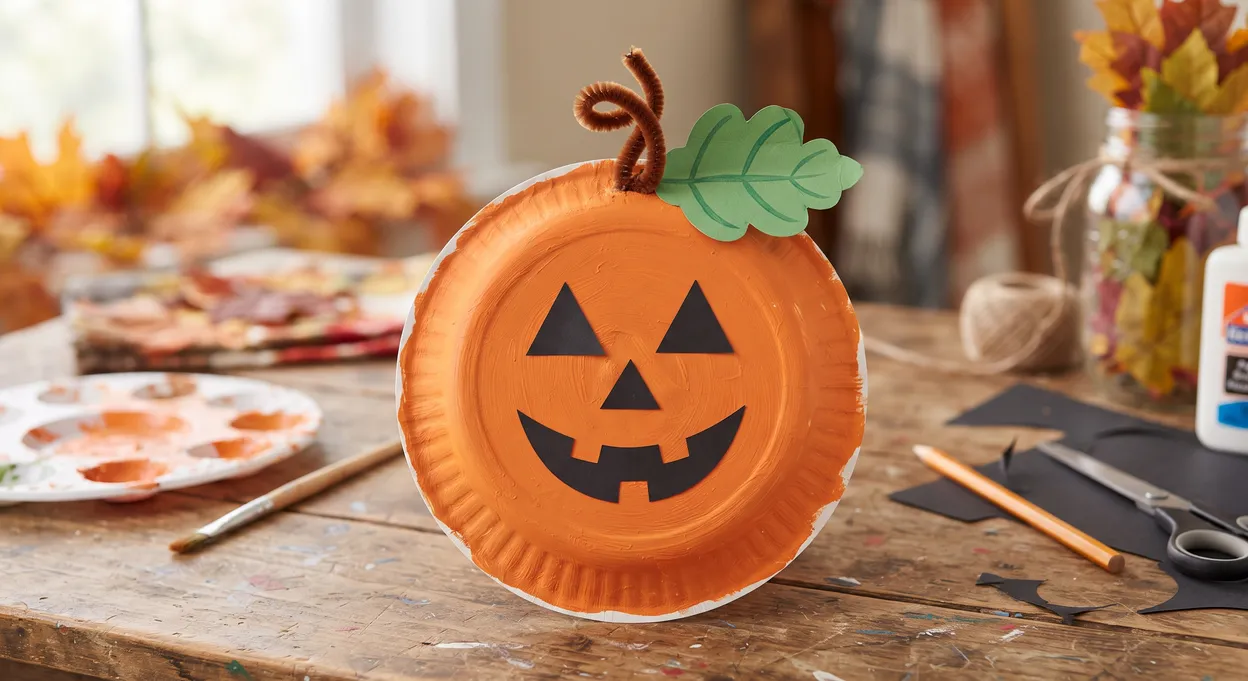
Flip a paper plate over and paint the back orange, since that side has fewer ridges and dries more evenly. Once it’s dry, glue on a brown pipe-cleaner stem and a green paper leaf, and if you want a jack-o’-lantern look, add a face now with a black marker or cut-paper shapes.
Handprint Pumpkin Patch
Paint a preschooler’s palm and fingers orange, fingers held together, and press the hand onto paper for a rounded print. Repeat it a few times across the page to build a row of pumpkins. After the paint dries, go back in with a green marker or crayon and add a stem and a curling vine above each one.
Tissue Paper Pumpkin Window Cling
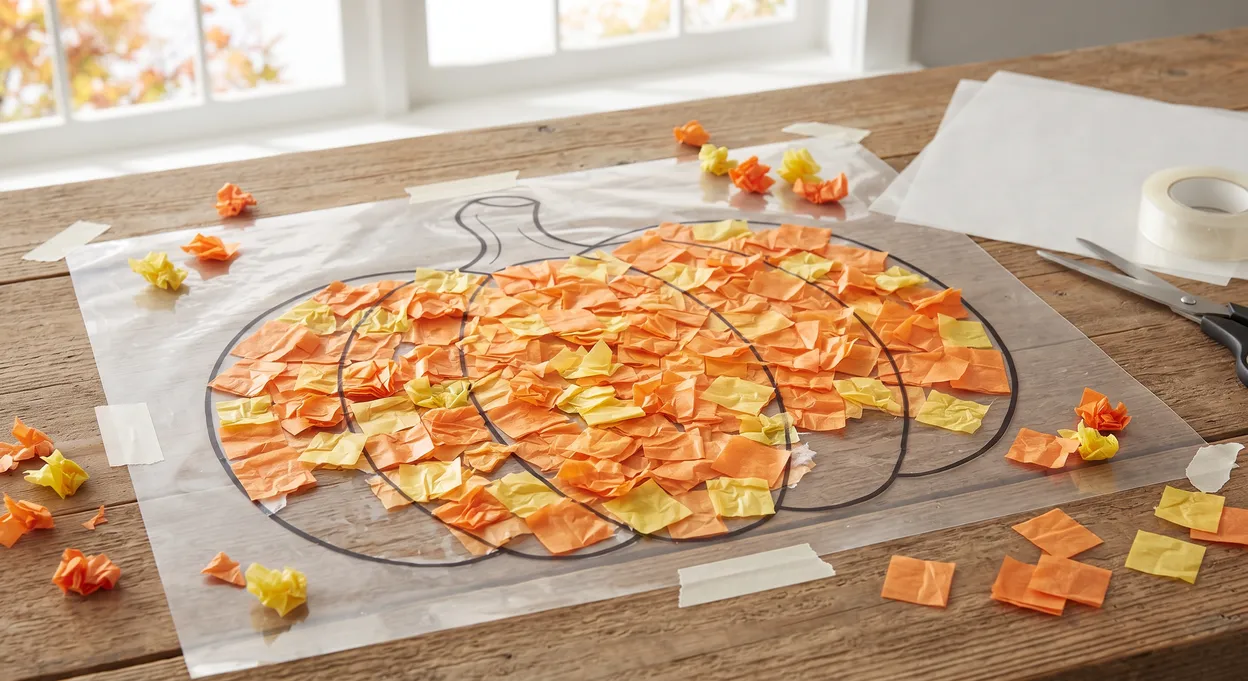
Tape a piece of clear contact paper to a table, sticky side up, and draw a pumpkin outline on it. Kids crumple small squares of orange and yellow tissue paper and press them onto the sticky outline until it’s filled in. Seal the finished design with a second sheet of contact paper on top, trim around the shape, and it’s ready to tape to a window.
Mosaic Paper Pumpkin
Start with a large pumpkin outline, drawn or printed on a sheet of paper. Tear or cut orange, red, and yellow paper into small, uneven pieces. Working in sections, spread a little glue and press the scraps on so they overlap slightly, until the whole pumpkin is covered.
Paper Cup Pumpkin
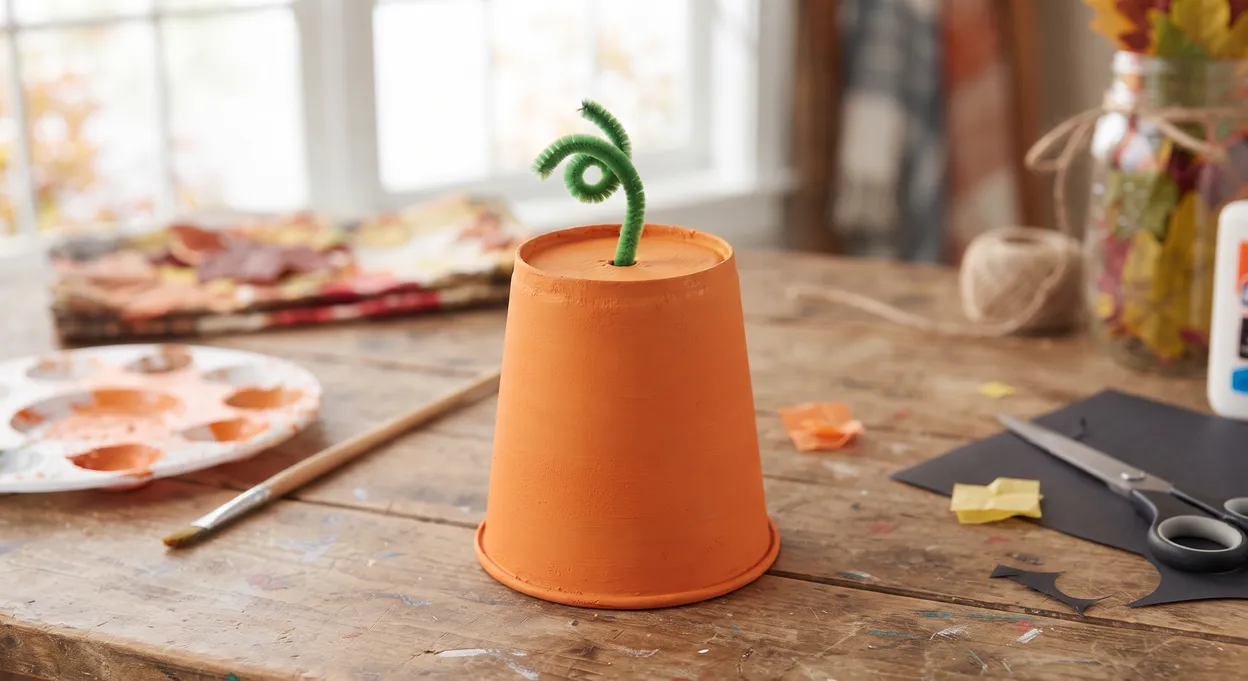
Paint a paper cup orange and set it aside to dry completely. Flip it upside down so the open end sits on the table, then poke a small hole in the base with a pencil. Push a green pipe cleaner through the hole and bend the inside end so it holds in place as a stem.
Pumpkin Paper Chain Garland
Cut a strip of orange paper about 4 to 6 inches wide and accordion-fold it into even sections. On the top folded edge, draw half a pumpkin shape, then cut around it through every layer, but leave the fold itself uncut or the chain will fall apart when you unfold it. Tape the two ends together to hang the finished garland.
Pumpkin Painting and Process Art Projects
These pumpkin painting and process art projects are all about process over product: basically permission to let a preschooler loose with paint without worrying how the finished pumpkin looks. NAEYC points to this kind of messy, hands-on art as especially valuable at this age.
Q-Tip Dot Pumpkin
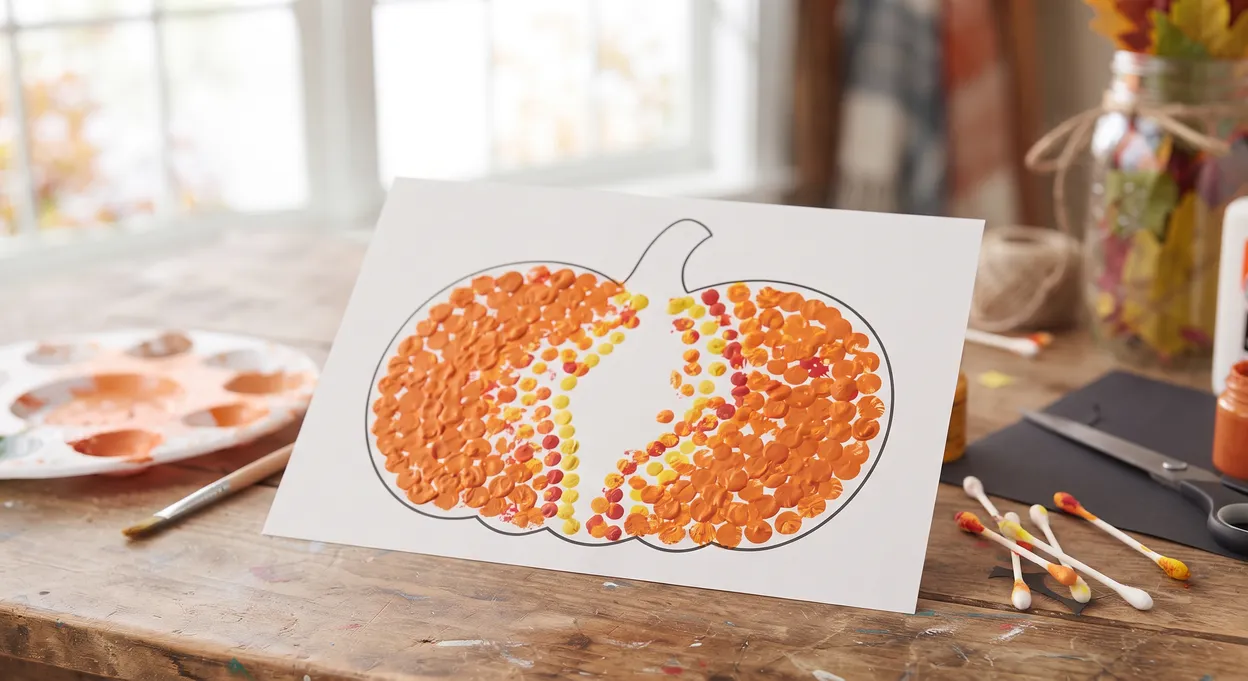
Draw or print a pumpkin outline. Dip a cotton swab in orange paint and dot it inside the lines, redipping often so the color stays solid. A second swab in yellow or red adds some variation before everything dries.
Bubble Wrap Pumpkin Print
Cut bubble wrap into a rough pumpkin shape, or just use a rectangle if you’re printing onto a bigger sheet. Paint the bumpy side orange, press it paint-side down onto paper, and lift it straight up without sliding it so the texture stays sharp. Repaint between prints.
Glue and Watercolor Resist Pumpkin
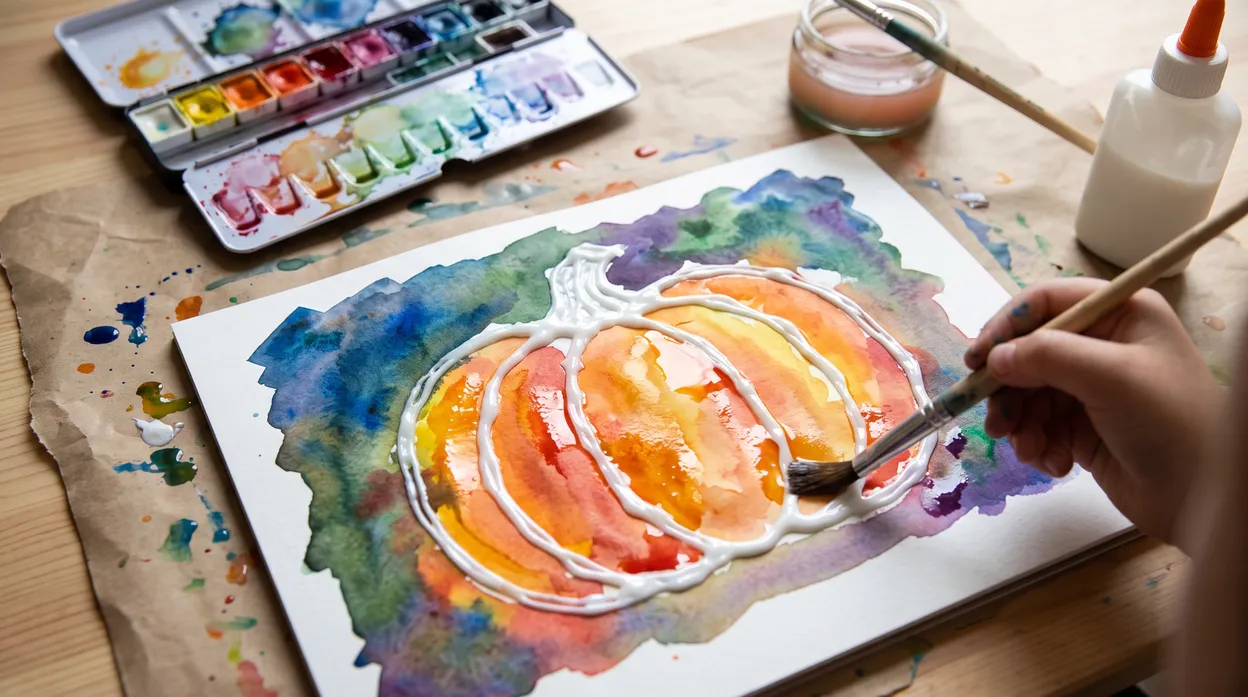
Using a bottle of white glue, trace a pumpkin outline onto plain paper, going over each line twice so it’s raised and visible. This needs to dry overnight; painting over it too soon will smear the lines. The next day, brush watercolor across the whole page, and the dried glue will resist the paint, leaving the pumpkin outline white against the color.
Fork-Painted Pumpkin
Start with a pumpkin outline on paper. Dip a plastic fork’s tines in orange paint and drag it downward inside the lines, which leaves several ridges at once. Reload the fork often, and drag a line or two in a darker orange or red for shading.
Salt-Painted Pumpkin
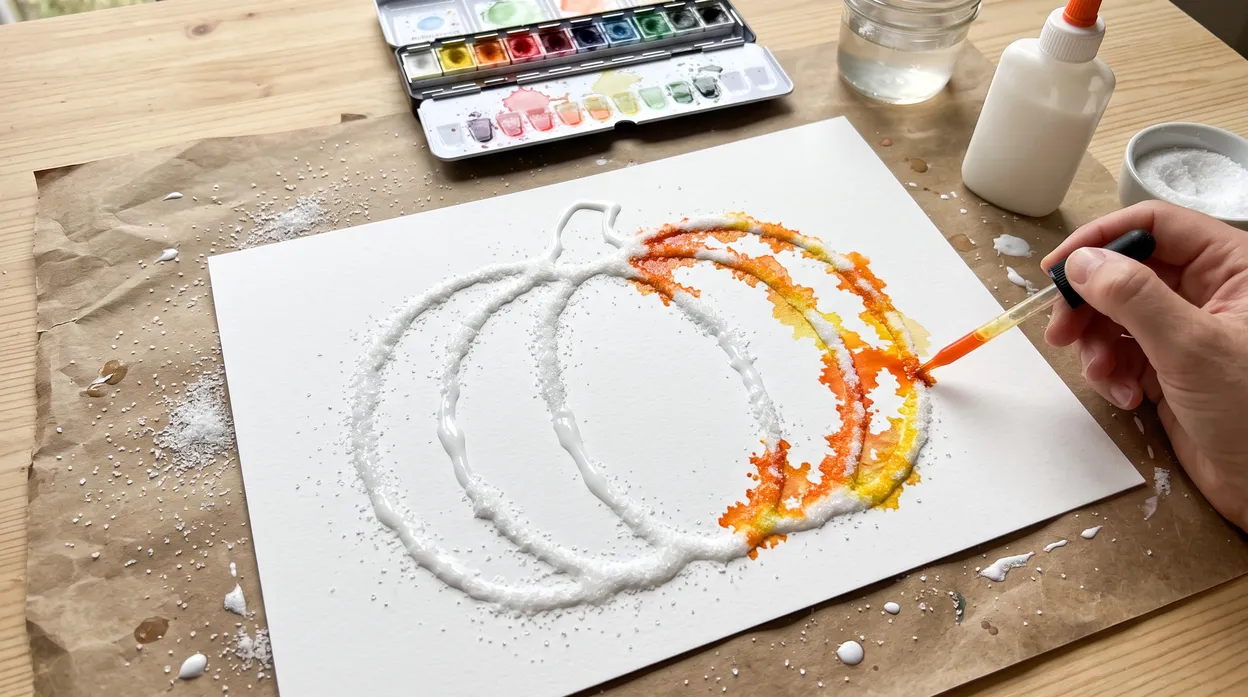
Trace a pumpkin outline with a glue bottle on heavy paper or cardstock, then sprinkle salt over the wet glue right away so it sticks along the lines. Tip off the extra salt. While the glue underneath is still damp, touch a wet brush or eyedropper of liquid watercolor to the salted lines and watch the color spread through the crystals.
Marble-Rolled Pumpkin
Tape a sheet of paper into a shallow box lid so it can’t shift around. Add a few small dollops of orange and yellow paint, then drop in a marble. Tilt the lid slowly from side to side and corner to corner, and the marble will leave trails through the paint as it rolls.
Fine-Motor Pumpkin Craft Activities for Preschoolers
This batch of fine-motor pumpkin crafts leans hardest into small-hand practice. Buttons, pom-poms, yarn, and pasta all need real pinching, placing, and wrapping, the kind of small-hand work that’s oddly hard to sneak into a normal afternoon otherwise.
Button Pumpkin
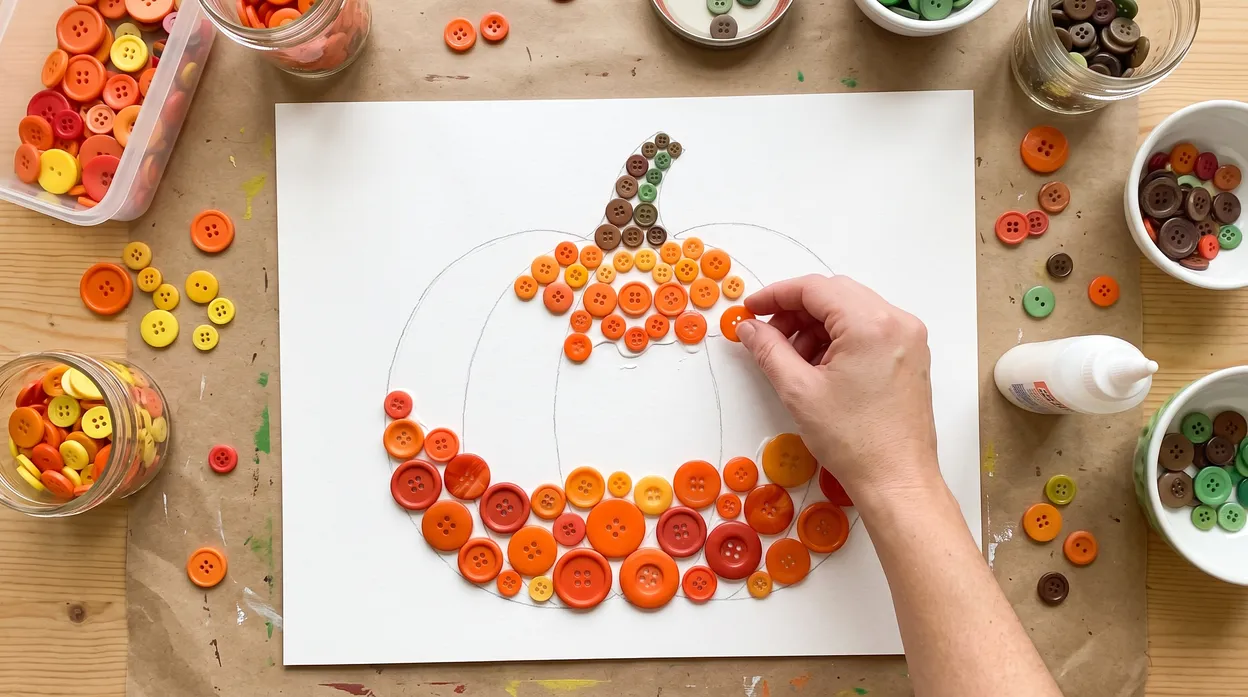
Start with a pumpkin outline on cardstock. Working from the bottom up, glue a row of your largest buttons across the widest part first, then switch to progressively smaller buttons as you move toward the top.
Pasta Pumpkin
Glue dry pasta, wheels, bowties, shells, whatever’s on hand, onto a paper pumpkin outline, overlapping the pieces so none of the paper underneath shows. Give the glue a few hours to dry fully, then paint over the entire thing in orange.
Pumpkin Seed Mosaic
Rinse the pulp off real pumpkin seeds and spread them on a towel to dry for a day, or toast them briefly in a low oven if you’re short on time. Paint them if you want color, and let that dry too. Working in small sections, spread glue on a pumpkin outline and press the seeds into it in overlapping rows.
Yarn-Wrapped Pumpkin
Cut a pumpkin shape out of cardboard and tape one end of a length of orange yarn to the back. From there it’s just winding: around and around, snug but not stretched, until the front is completely covered. Tape off the loose end and glue on a small pipe-cleaner stem.
Pom-Pom Sorting Pumpkin
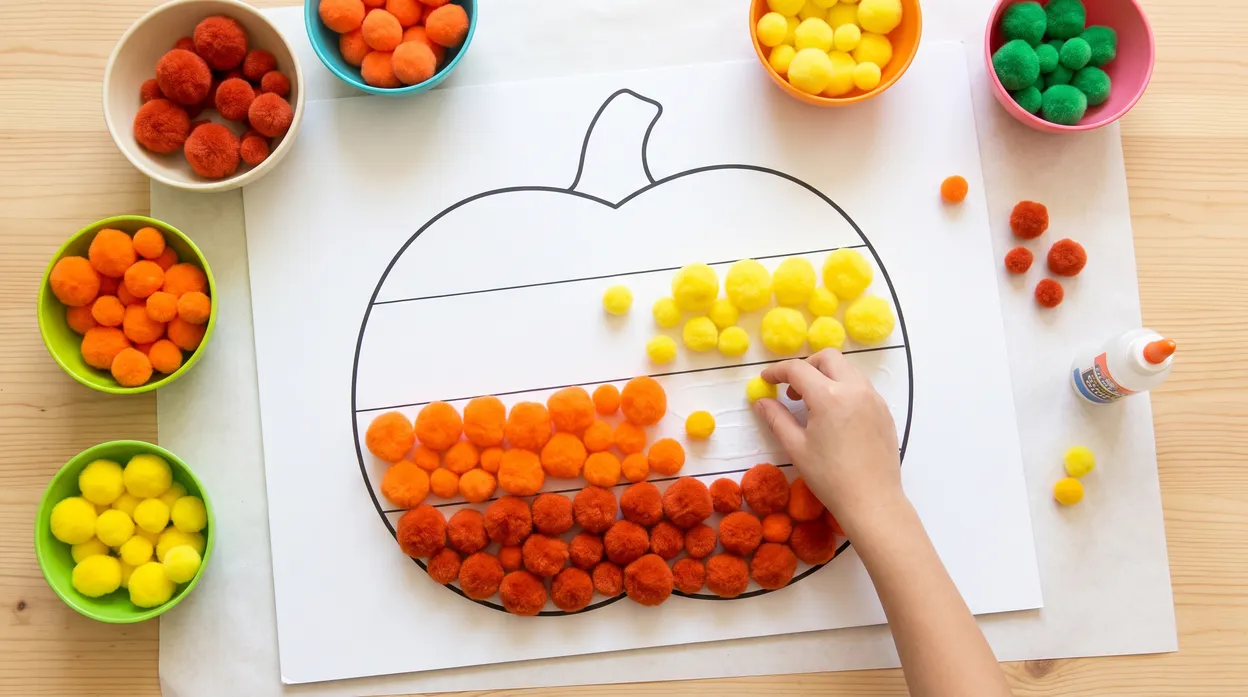
Divide a pumpkin outline into a few horizontal bands. Sort pom-poms into small bowls by color or size first, then fill in one band at a time, working from the bottom of the pumpkin up.
Lacing Pumpkin Card
Cut a pumpkin out of cardboard or a sturdy paper plate and punch holes evenly around the edge. Tie a bead or a tight knot onto one end of a shoelace so it can’t slip through the first hole, then thread the free end in and out of the holes all the way around.
No-Carve Real Pumpkin Crafts for Preschoolers
Not every pumpkin craft needs scissors or glue. These no-carve crafts use an actual mini pumpkin, decorated without any knives or carving involved, so even the youngest preschoolers can join in safely.
Painted Mini Pumpkins
Set a small real pumpkin on newspaper to catch drips. Washable paint and a brush are really all it takes from here; let the preschooler cover it however they want, switching colors as they go. It can take several hours to dry fully depending on how thick the paint goes on, so find somewhere it can sit undisturbed.
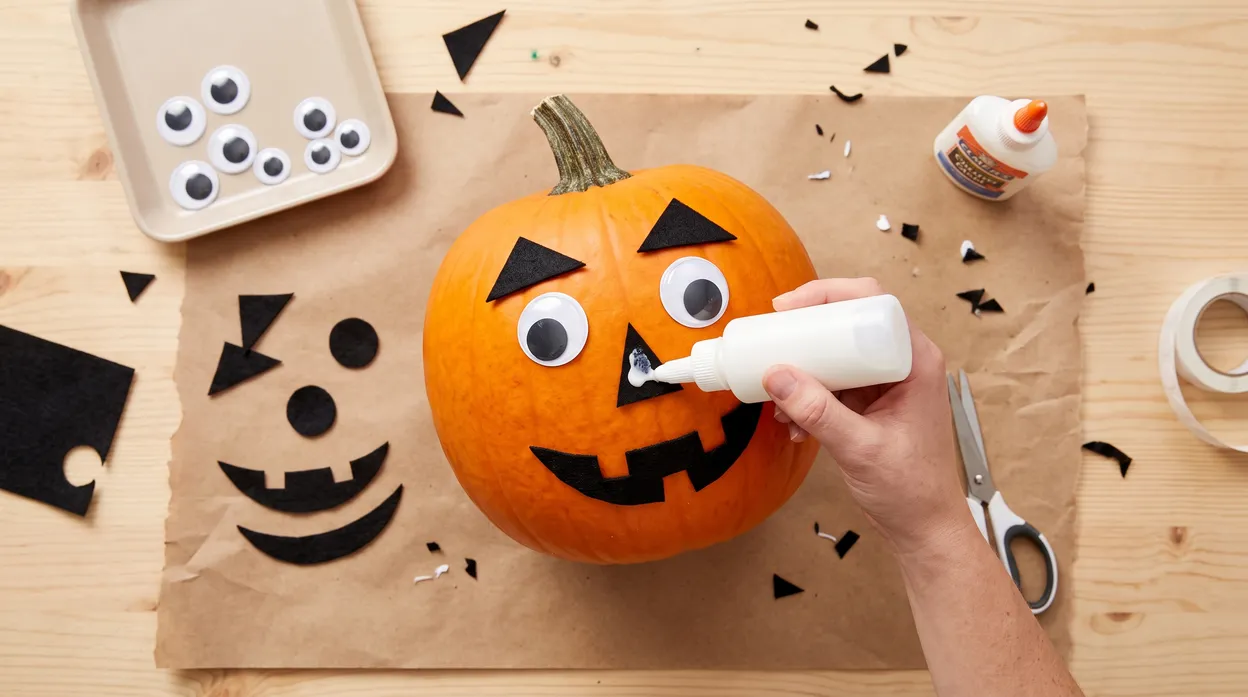
Googly-Eye Pumpkin Faces
Cut a few felt shapes ahead of time, triangles or circles for eyes and eyebrows, a curved strip for a mouth. Dab craft glue or a glue dot on the back of each piece, including the googly eyes, and press them onto the pumpkin one at a time, holding each for a few seconds so it sets before adding the next.
Washi Tape Pumpkin
Tear off a handful of washi tape strips in advance and stick them along a table edge so they’re easy to grab. Kids peel one strip at a time and wind it around the mini pumpkin from top to bottom, overlapping each new strip a little over the last.
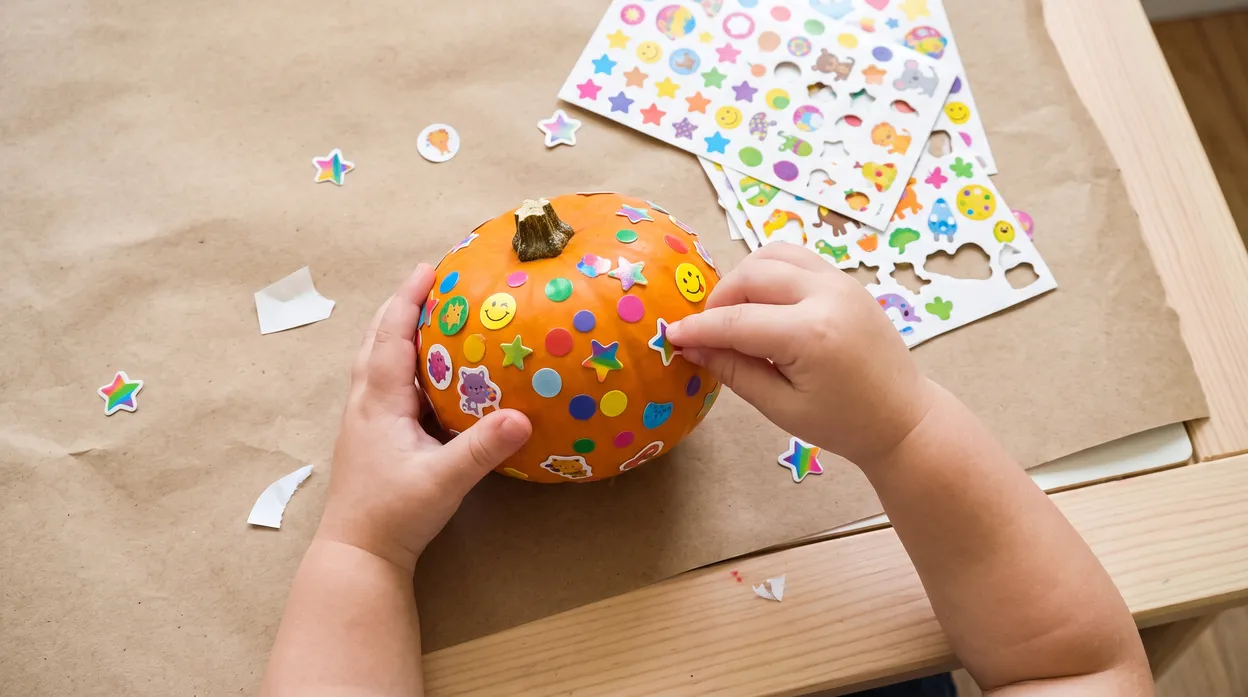
Sticker Pumpkin
A sheet or two of stickers sized for small hands, plus a mini pumpkin, is the whole supply list here. Let a toddler or young preschooler peel and press stickers onto the surface in any order, handing over more as they run out.
Glitter Glue Swirl Pumpkin
Work directly on the pumpkin’s surface with a bottle of glitter glue, tracing swirls, dots, zigzags, or a simple face. Go section by section so the glue doesn’t run, then set it on wax paper overnight to dry completely.
Nature Pumpkin
Collect leaves, acorns, and twigs on a short walk first. Lay them out on or around the pumpkin to plan the arrangement before anything gets glued down. A hot glue gun handled by an adult, or a strong craft glue, works best here, since natural materials don’t hold with a regular glue stick; attach one piece at a time and hold until it sets.
Quick 5-Minute Pumpkin Crafts for Busy Days
Some afternoons just don’t have 30 minutes to spare for drying time and cleanup. Honestly, most afternoons don’t. These pumpkin craft ideas for preschoolers come together fast and clean up even faster.
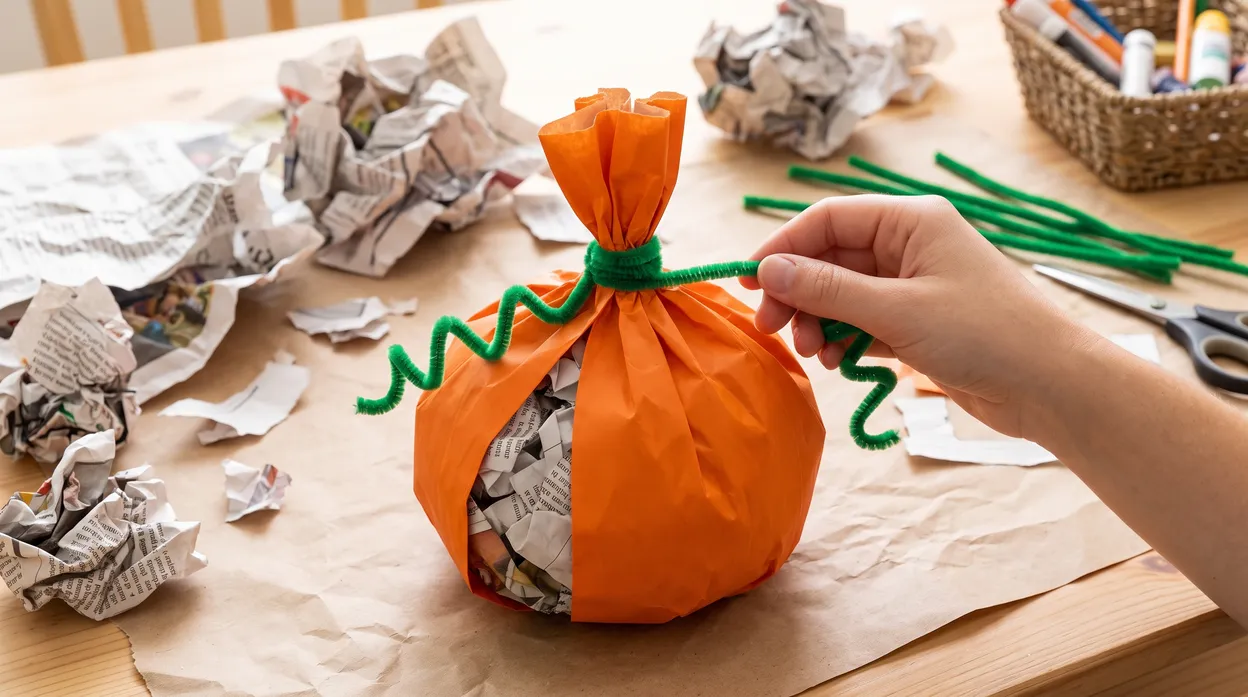
Paper Bag Pumpkin
Crumple scrap paper or newspaper and stuff it into a small orange paper bag until it’s about two-thirds full. Gather the open end, twist it tight, then wrap a green pipe cleaner around the twist a few times and curl the ends into a stem.
Finger-Painted Pumpkin
Put a small puddle of orange washable paint on a plate. A preschooler’s fingers do the rest: dipping, pressing, and dragging across paper to fill in a pumpkin shape. A few yellow or red fingerprints on top add texture before it dries.
Paper Plate Pumpkin Puzzle
Grab a paper plate pumpkin that’s already painted and dry. Flip it over and draw three or four big, simple puzzle lines across the back, then cut along them. Mix up the pieces and let the child reassemble it.
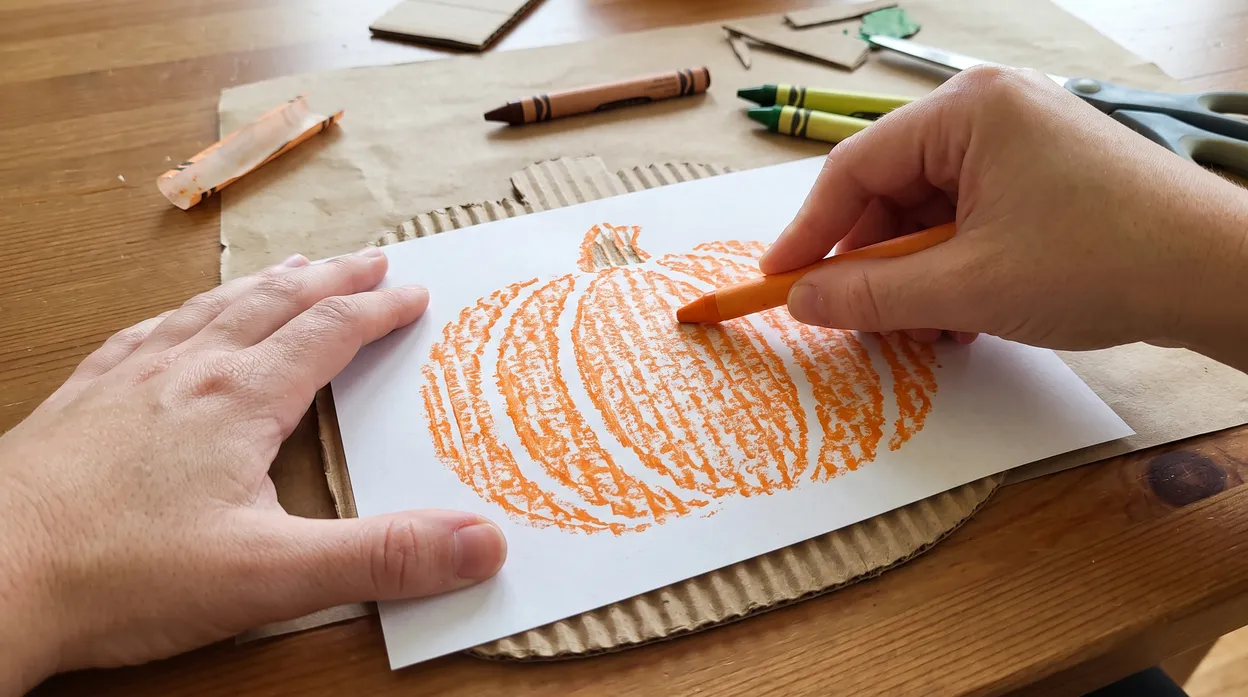
Crayon Rubbing Pumpkin
Peel the wrapper off a crayon so the whole side is exposed. Lay a thin sheet of paper over something textured, corrugated cardboard cut into a pumpkin shape works well, and hold it steady while you rub the flat side of the crayon firmly across the top. The texture underneath shows through almost immediately.
Help your child thrive with playful learning
Turn screen time into real growth with Keiki's educational games.
Try KeikiSafety and Supply Tips for Pumpkin Crafts
A few simple precautions are the difference between a pumpkin craft that stays fun and one that ends with a trip to urgent care or a very long stain-removal session.
- Skip carving tools for anyone under 5. Let an adult handle any cutting into a real pumpkin, and stick to paint, stickers, or glue for the kids’ part.
- Watch small parts closely with toddlers. Buttons, pom-poms, and googly eyes are choking hazards for children under 3, so swap in larger materials or stay within arm’s reach.
- Use washable paint and glue. It saves clothes, tables, and your patience, and it’s gentler on little hands than craft paints meant for older kids.
- Rinse and dry pumpkin seeds before gluing. Wet seeds mold fast. Dry ones hold glue and paint much better.
- Keep a basic supply box ready. Orange, green, and brown construction paper, washable paint, glue sticks and liquid glue, safety scissors, pipe cleaners, and googly eyes will cover most of the crafts on this list.
Create and Draw More with Keiki
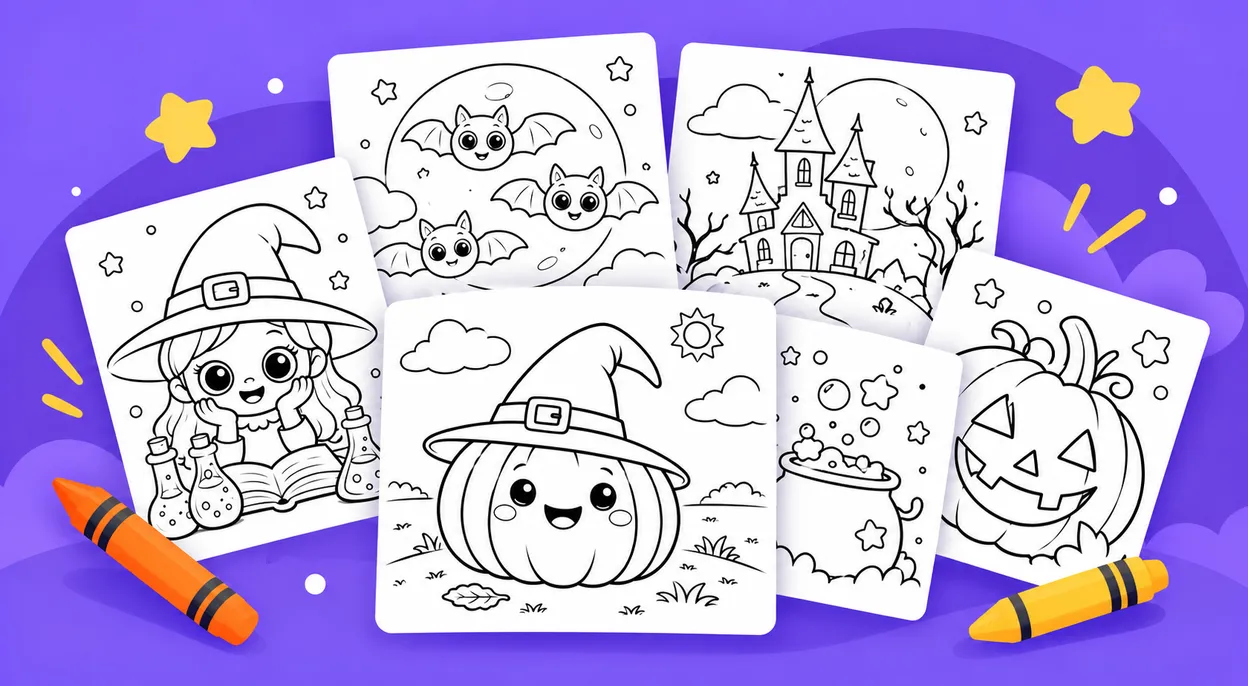
Once the glue and glitter settle, Keiki’s Halloween coloring pages, free to print from the Keiki website, give preschoolers an easy way to keep that pumpkin creativity going without reopening the craft bin. Printing one out and handing over a box of crayons works the same fine motor muscles as a hands-on craft: staying inside a line, picking colors, minus the drying time and the cleanup. Print one after a craft session, and a preschooler gets a second, much tidier pass at the same pumpkin they just spent an afternoon gluing together.
Tips for Running Pumpkin Crafts in a Classroom or at Home
- Prep outlines ahead of time. Pre-cutting pumpkin shapes for younger preschoolers means more time creating and less time waiting around.
- Lay down a mess mat. A plastic tablecloth or a few sheets of newspaper under each project saves a lot of cleanup later. Trust the mess mat.
- Offer a choice of two or three crafts. Letting preschoolers pick between a couple of options builds a small sense of independence without overwhelming them.
- Let the finished pumpkin look “wrong.” A lopsided pumpkin, or one with purple polka dots, is still a win. The process matters more than matching a Pinterest photo.
- Display the results. A row of finished pumpkin crafts taped along a classroom window or a kitchen wall gives kids a proud, visible reminder of what they made.