Winter Crafts for Toddlers and Babies, Sorted by What They Can Actually Do

Winter crafts for toddlers go a lot better when the craft fits the age. A 10-month-old can press a foot onto paper. A 2-year-old will tear paper and peel stickers for as long as you let them. A 3-year-old is ready for glue and a real brush. The list below is sorted by age, so jump to your kid's section.
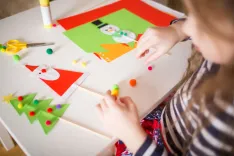
Everything here runs on stuff you probably own already: paper plates, cotton balls, washable paint, tape, stickers. Each craft lists what you need, roughly how long it takes and numbered steps. When a craft has a small-parts problem, a note says what to swap in.
The January section has ideas with no Christmas theme.
Key Takeaways
- Match the craft to the age: footprints and sealed bags for babies, tearing and stickers for 2-year-olds, glue and brushes for 3-year-olds.
- Skip glitter, beads and foam pieces until your child is 3.
- Paper, cotton balls and washable paint cover most of the ideas below.
- Stop when your child walks away, because a short session still counts.
How to Pick Toddler Winter Crafts That Fit Your Kid's Age
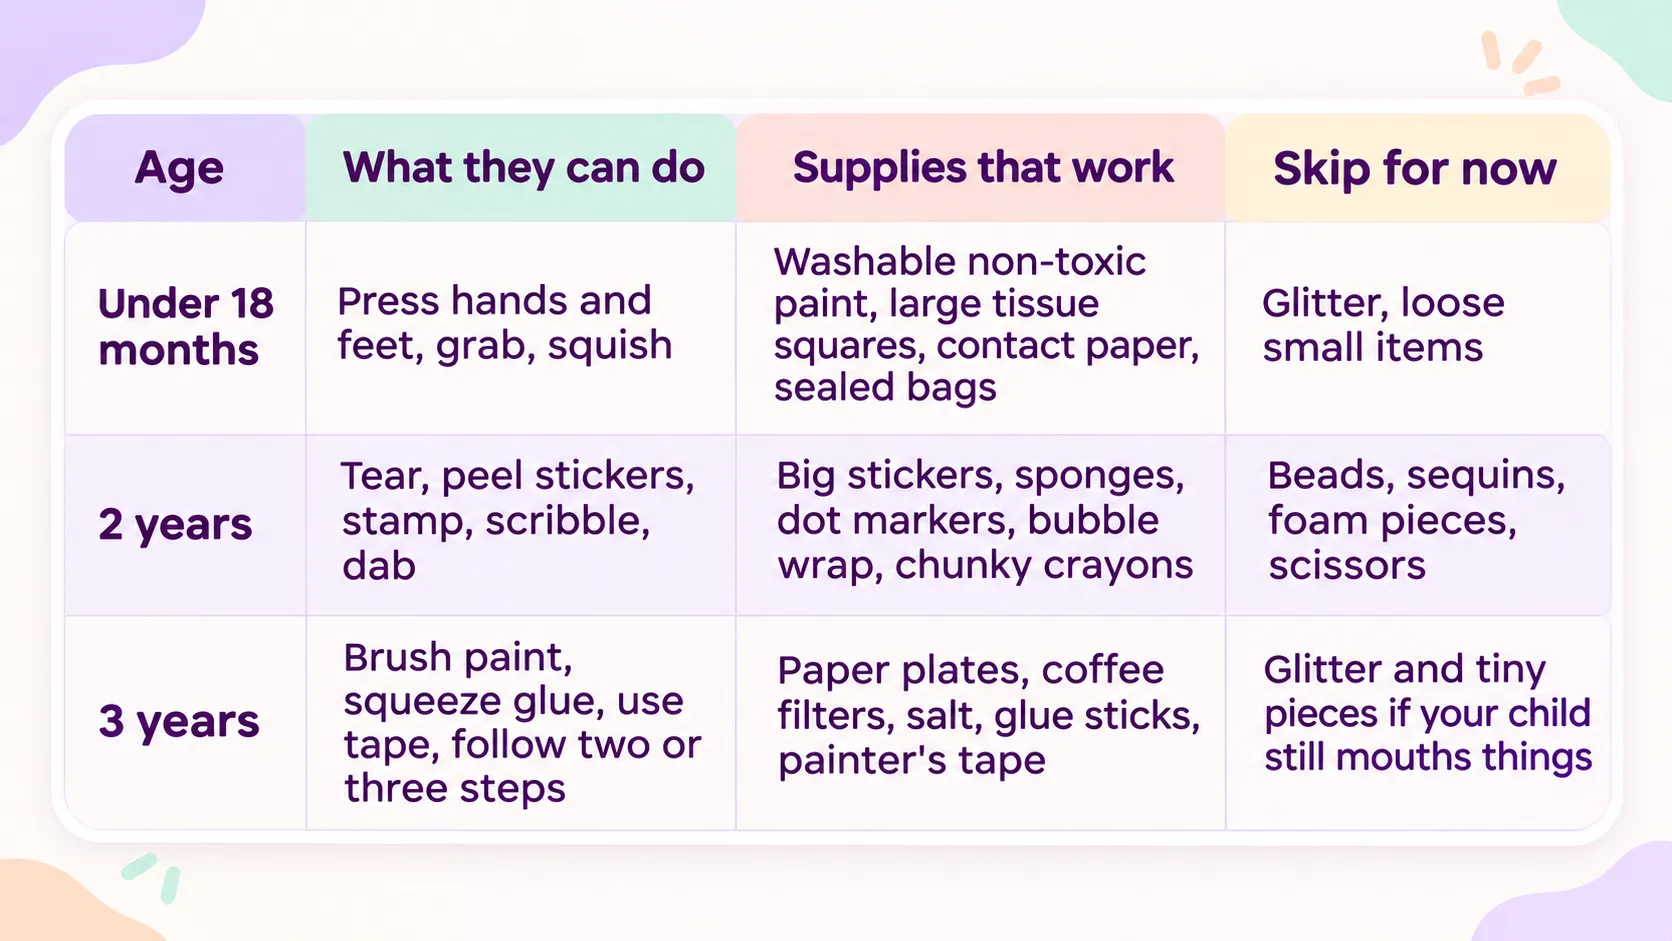
Match the craft to what your child's hands can do right now. Babies under about 18 months press, slap and grab, so you do the work and they lend a hand or a foot. By age 2, kids can tear paper, peel stickers and stamp. By age 3, a brush and a glue stick are fair game, and some kids start copying a circle or a line.
Treat those ages as rough, and move across a row if your 2-year-old is already gluing well. The 2-year-old and 3-year-old sections below are all winter crafts for toddlers age 2-3, split up because the skills differ.
A craft supply shoebox on a high shelf lets you start any project without hunting for supplies. Fill it with paper, painter's tape, washable paint, big stickers, chunky crayons and a glue stick.

Help your child
grow with Keiki
We’ll help you turn everyday screen time
into real learning progress.
Infant Winter Crafts for Babies Under 18 Months
Winter crafts for babies under 18 months are mostly keepsakes: you plan and set up, and your baby presses a hand or a foot. Babies this age put hands and feet in their mouths, so use washable non-toxic paint, keep sessions short and wipe skin clean right away.
If you'd rather skip paint, the guide to infant activities has more winter projects for infants, plus sensory and play ideas for the first year.
Footprint Penguin Keepsake
You'll need: white paper, washable non-toxic black paint, a plate, a damp cloth, an orange marker and a black marker. Time: 10 minutes, plus drying.
- Tape the paper to the floor or a high chair tray and put the damp cloth within reach.
- Spread a thin layer of black paint on the plate, then press your baby's foot into it.
- Press the foot flat onto the paper, lift straight up and wipe the foot clean right away.
- When the print is dry, draw a white belly, an orange beak, two eyes and little feet around it. Either direction works, because you draw the penguin around the print.
Feet are easier to print than hands for a baby in a high chair, because they move less.
Handprint Mitten Card
You'll need: paper or card stock, washable non-toxic paint, a plate, a strip of colored paper, a glue stick, a marker and a damp cloth. Time: 10 minutes, plus drying.
- Fold the paper in half like a card.
- Brush a thin layer of paint across your baby's palm and fingers.
- Press the palm onto the front of the card with the thumb sticking out to the side, then lift straight up and wipe the hand clean.
- When the paint is dry, glue the paper strip across the wrist end as a cuff and write the date inside.
A closed fist still makes a mitten shape. The finished card works as a gift for grandparents.
Snowman Squish Bag
You'll need: a zip-top freezer bag, white washable paint, packing tape and a black marker. Time: 5 minutes.
- Spoon a few tablespoons of paint into the bag and press the air out.
- Seal the bag, then run packing tape along the whole seal so it can't open.
- Draw a snowman outline on the front with the marker.
- Tape all four edges flat to a high chair tray or a window.
- Let your baby squish the paint around inside the lines.
Stay next to your baby the whole time, and bin the bag if it leaks.
Sticky Snow Window
You'll need: clear contact paper, white tissue paper, painter's tape and a window or glass door. Time: 5 minutes to set up.
- Cut a piece of contact paper about the size of a placemat and peel off the backing.
- Tape it to the window with the sticky side facing out, low enough for your baby to reach.
- Tear the tissue paper into squares bigger than your palm.
- Hand the squares over one at a time so your baby can press them on and pull them off.
Tissue is soft and easy to grab, but it can head for the mouth, so stay close.
Tummy Time Snowflake Poster
You'll need: a sheet of black paper, white non-toxic paint, a brush and painter's tape. Time: 10 minutes, plus an hour or so of drying.
- Paint a big plus sign and a big X so they cross in the middle of the paper.
- Add a short V shape at the end of each line, then a few dots around the edges.
- Let it dry completely.
- Tape all four edges to the floor where tummy time happens.
Bold white shapes on black paper give a baby on tummy time something to look at and reach for. Paint it during nap time.
Easy Winter Crafts for 2-Year-Olds
The best winter crafts for 2-year-olds use big movements: tearing, stamping, sticking and dabbing. Put out two or three materials at most. Brush the glue onto the paper yourself so your kid gets straight to the fun part.
If your 2-year-old likes the paint part best, there are plenty more in these easy painting ideas for kids.
On days when paint is off the table, Keiki World has art games for 2-year-olds you can play together.
Cotton Ball Snowman
You'll need: blue paper, white glue and a brush, cotton balls, orange paper and paper scraps. Time: 10 minutes.
- Draw three stacked circles on the blue paper, small on top and big on the bottom.
- Brush glue inside each circle.
- Let your kid press cotton balls onto the glue until the snowman looks fluffy.
- Glue on an orange paper triangle for the nose and a hat cut from scraps.
Stay beside your kid. If cotton balls still go in the mouth, tear white tissue paper into bits instead.
Bubble Wrap Snowy Tree
You'll need: paper, a brown marker, a piece of bubble wrap, a small block or box, tape, white washable paint and a plate. Time: 10 minutes.
- Draw a bare tree with a trunk and branches in brown marker.
- Wrap the bubble wrap around the block with the bumps facing out and tape it down on the back.
- Pour a thin layer of white paint onto the plate and press the wrapped block into it.
- Show your kid how to stamp the block onto the branches and the ground.
The block keeps the bubble wrap from tearing into small pieces.
Big-Sticker Mittens
You'll need: paper, scissors, a marker, a sheet of big round stickers, and tape or yarn. Time: 10 minutes.
- Fold the paper in half and cut out a mitten shape so you get two matching mittens.
- Draw a cuff line across the bottom of each mitten.
- Hand over the stickers and let your kid cover the mittens any way they want.
- Tape the pair to a window or hang them on yarn.
Big stickers are easier to peel than small ones, and peeling is good finger practice.
Torn-Paper Polar Bear
You'll need: paper, a black marker, white paper and a glue stick. Time: 10 minutes.
- Draw a big polar bear outline with the marker.
- Show your kid how to tear the white paper: pinch with two hands and pull apart.
- Rub the glue stick inside the outline and let your kid press the torn pieces on.
- Once the glue is set, add a black nose and eyes with the marker.
Gaps are fine. Expect more tearing than gluing.
Sponge-Stamped Snowballs
You'll need: a kitchen sponge, scissors, white washable paint, a plate and dark blue paper. Time: 10 minutes.
- Cut the sponge into three or four chunky pieces, each big enough to fill a fist.
- Pour a thin layer of white paint onto the plate.
- Let your kid dip a piece and stamp circles onto the blue paper.
- Bin the sponge pieces when you're done.
About five stamps makes a snowstorm. Chewed sponge bits are easy to lose in the toy box, so the pieces go in the bin.
Dot-Marker Winter Hat
You'll need: paper, a marker and washable dot markers. Time: 10 minutes.
- Draw a big beanie shape with a band along the bottom and a circle on top.
- Take the cap off one dot marker at a time and set the caps on a high shelf.
- Show your kid how to hold the marker upright and press straight down to make a dot.
- Let them dab dots all over the hat, then put the caps back on.
Dot marker caps are small enough to choke on, so keep them out of reach until you're done.
Contact Paper Snowflake Suncatcher
You'll need: two matching sheets of clear contact paper, torn tissue paper in white, blue and silver, scissors and tape. Time: 15 minutes.
- Peel the backing off one sheet and tape it to the table with the sticky side up.
- Let your kid press the torn tissue paper onto the sticky surface.
- Peel the backing off the second sheet, lay it on top sticky side down and smooth it flat.
- Trim the whole thing into a snowflake or a circle. That step is yours, not your kid's.
- Tape it to a window so the sun shines through.
Sunlight through the window makes the colors glow.
Crayon Rubbing Snowflake
You'll need: thick cardboard, scissors, thin paper, a chunky crayon and tape. Time: 10 minutes.
- Cut a snowflake from the cardboard and tape it to the table.
- Lay the thin paper over it and tape down the corners.
- Peel the wrapper off the crayon and show your kid how to rub with the side.
- Keep rubbing until the snowflake shape appears through the paper.
Use a whole crayon, since broken pieces are easier to put in the mouth.
Winter Crafts for 3-Year-Olds
Three-year-olds can handle glue sticks, brushes, tape and projects with two or three steps, so these crafts have more steps. Keep step one easy and let your kid pick the colors.
Paper Plate Snowman
You'll need: a paper plate, white washable paint, a brush, construction paper, a strip of fabric or paper for a scarf, a glue stick and an orange marker. Time: 15 minutes, plus drying.
- Let your kid paint the plate white and leave it to dry.
- Cut a hat and a scarf from the construction paper and fabric. That's your job.
- Glue the hat on top and the scarf across the bottom edge.
- Tear or cut small paper circles for the eyes and buttons and let your kid glue them on.
- Draw an orange carrot nose and hang the snowman on a door.
Paper circles replace buttons, which are a small-parts risk for children under 3.
Coffee Filter Snowflakes
You'll need: white coffee filters, washable markers, a brush or spray bottle, water, a towel and tape. Time: 10 minutes, plus drying.
- Flatten a coffee filter on a towel.
- Let your kid color it with washable markers, using dots and scribbles.
- Dab on a little water with a brush or spritz it from a spray bottle and watch the colors spread.
- Leave it to dry flat, then tape it to a window so the light comes through.
Tape-Resist Winter Trees
You'll need: painter's tape, a sheet of thick paper, blue washable paint and a wide brush. Time: 15 minutes, plus drying.
- Press one long strip of tape up the middle of the paper for the trunk.
- Add shorter strips slanting up from the trunk for branches, and press every edge down firmly.
- Let your kid paint blue over the whole page, tape and all.
- Wait until the paint is completely dry, then peel the tape slowly to reveal a white tree.
Let your kid peel the tape for the reveal.
Salt-Painted Snowflakes
You'll need: thick cardboard, white glue, table salt, watercolors or food coloring mixed with water, a brush and a baking tray. Time: 15 minutes, plus drying.
- Set the cardboard in the baking tray and squeeze glue onto it in a snowflake pattern.
- Shake a generous layer of salt over the glue.
- Tip the cardboard to let the extra salt fall into the tray.
- Touch a wet, loaded brush to the salt and watch the color creep along.
- Leave it flat to dry.
Keep the salt away from your kid's mouth, and keep a hand under the cardboard so it doesn't slide off the table.
Paper Bag Penguin Puppet
You'll need: a small paper lunch bag, black washable paint, a brush, white and orange paper, a glue stick and a marker. Time: 15 minutes, plus drying.
- Paint the bag black, front and back, and leave it to dry.
- Cut a white oval for the belly and glue it to the front of the bag below the folded flap.
- Glue two paper eyes and an orange triangle beak onto the flap, which becomes the head.
- Glue two orange paper feet to the bottom edge.
- Slip a hand inside and make the penguin waddle.
Handprint Snowy Tree
You'll need: paper, brown and white washable paint, two plates, a brush and wet wipes. Time: 15 minutes, plus drying.
- Brush a thin layer of brown paint onto your kid's hand and forearm.
- Press them onto the paper with the fingers spread and the forearm pointing down.
- Wash up, then wait until the brown paint is dry.
- Let your kid dab white paint snow onto the branches with a fingertip or a chunky sponge piece, plus a few dabs on the ground for a snowbank.
The forearm makes the trunk and the spread fingers make the branches.
Pinecone Snowy Owl
You'll need: a dry pinecone, white washable paint, a brush, two white paper circles, an orange paper triangle and white glue. Time: 15 minutes, plus drying.
- Shake out any dirt from the pinecone and make sure it's dry.
- Let your kid paint it white and leave it to dry.
- Glue the two paper eyes near the top and the orange beak between them.
- Stand the owl on a windowsill.
Hot Cocoa Mug Collage
You'll need: brown paper, scissors, a sheet of background paper, a glue stick, white paper and a gray crayon. Time: 10 minutes.
- Cut a mug shape with a handle from the brown paper. That's your job.
- Glue the mug onto the background paper.
- Let your kid tear the white paper into small marshmallow pieces and glue them above the rim.
- Scribble wavy steam lines above the mug with the gray crayon.
January Crafts for Toddlers After the Holidays
These four January crafts have no holiday theme. They use snow, ice and arctic animals, plus supplies already in your craft drawer.
Ice Painting
You'll need: a loaf pan or plastic container, water, food coloring, paper, a tray and tape. Time: 5 minutes to prep, plus freezing overnight.
- Fill the container with water and add a few drops of food coloring.
- Freeze it overnight.
- Tape a sheet of paper to a tray.
- Run warm water over the outside of the container for a few seconds to release the block, then set it on the paper.
- Let your kid slide the block around while it melts into streaks of color.
A single large block is safer than small cubes for kids who still mouth things.
Snow Painting Outside
You'll need: two or three squeeze bottles, water, food coloring and a patch of snow. Time: 10 minutes.
- Fill each bottle with water and add several drops of food coloring.
- Shake the bottles to mix the color.
- Bundle your kid up and head outside.
- Let them squeeze the colored water onto a patch of snow to draw.
Squeeze bottles are easier for small hands than spray triggers. If there's no snow where you live, tape white paper to a fence and paint that.
Arctic Animal Week
You'll need: the supplies for the Paper Bag Penguin Puppet, Torn-Paper Polar Bear and Pinecone Snowy Owl, plus a few library books about arctic animals. Time: 15 minutes a day.
- Pick three or four animals, such as a penguin, a polar bear and a snowy owl.
- Match each animal to a craft from this article: the Paper Bag Penguin Puppet, the Torn-Paper Polar Bear and the Pinecone Snowy Owl.
- Do one craft a day, and read a library book about that animal while the glue dries.
Repeating the theme helps your kid recognize the shapes and names.
My First Snow Collage
You'll need: a printed photo, a sheet of paper, a glue stick, white tissue paper, cotton balls or paper snowflakes and a pen. Time: 10 minutes.
- Take a photo of your kid on the first snowy or very cold day and print it.
- Glue the photo to the middle of the sheet of paper.
- Let your kid add white tissue, cotton or paper snowflakes around it.
- Write the date on the back.
Skip the cotton balls if your kid still mouths things.
Winter Coloring Pages for Slow Afternoons
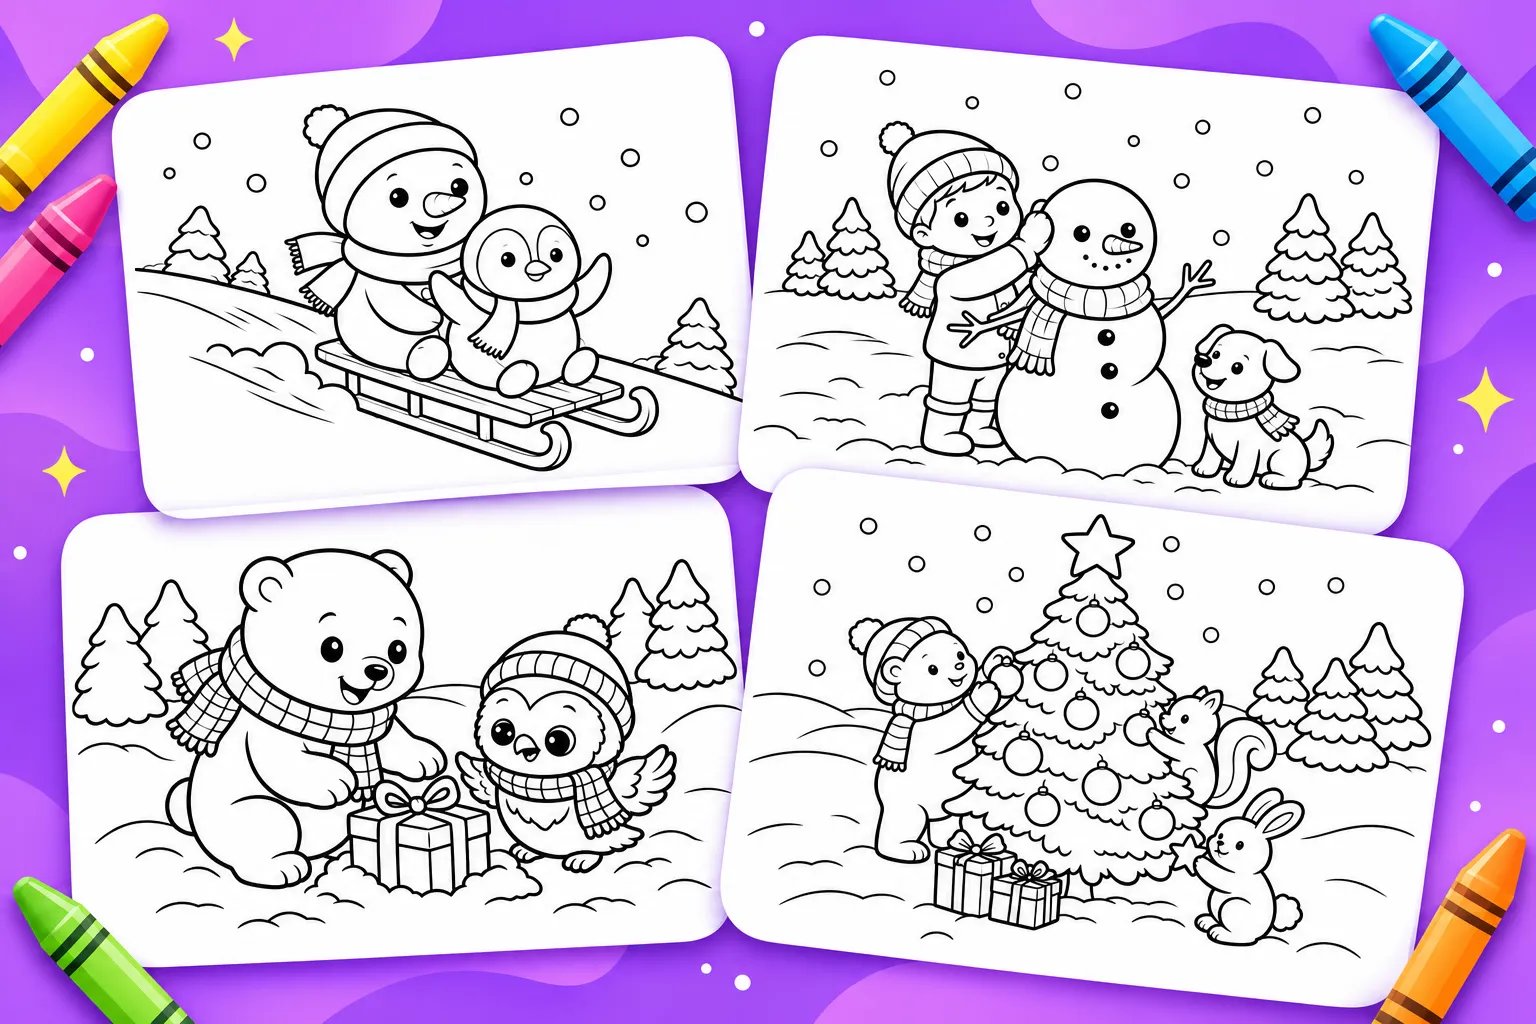
When you want a winter activity with no paint, glue or cleanup, a coloring page is the easiest one to set up. Keiki World has a collection of winter coloring pages on its website, ready to print whenever the afternoon needs something calm.
For you, that's a screen-free activity you can start in under a minute, which helps on days you're cooking dinner or finishing work. For your kid, it's a quiet stretch of hands-on drawing with no mess.
Coloring pages also work as a base for the winter crafts in this article. A 2-year-old can scribble on a page with a chunky crayon. A 3-year-old can color a page first, then glue cotton balls or tissue paper on top.
Keeping Winter Crafts Safe for Babies and Toddlers
Check every craft supply against a toilet paper tube. For a child 3 or younger, anything that fits inside an empty tube is a choking risk. Hold cotton balls, pom-poms, googly eyes, sequins and buttons up to the tube before you set them out.
Some supplies need more than the tube test. We advise against glitter for infants and toddlers. They also say small eyes, foam pieces and beads should only go to children 3 or older.
Washable, non-toxic paint wipes off hands and feet easily when you clean up right away. Keep a damp cloth and a bowl of warm water beside you before the first print.
A few habits keep a craft session calmer for you too:
- Stay within arm's reach the whole time, even for crafts that seem harmless.
- Tape paper to the table so it doesn't slide while your child works.
- Put a plastic tablecloth or an old shower curtain under the project.
- Put lids, caps and leftover pieces away as soon as you finish.